MAKING A COVID BOWL WITH ERIC AVERY: PART 2
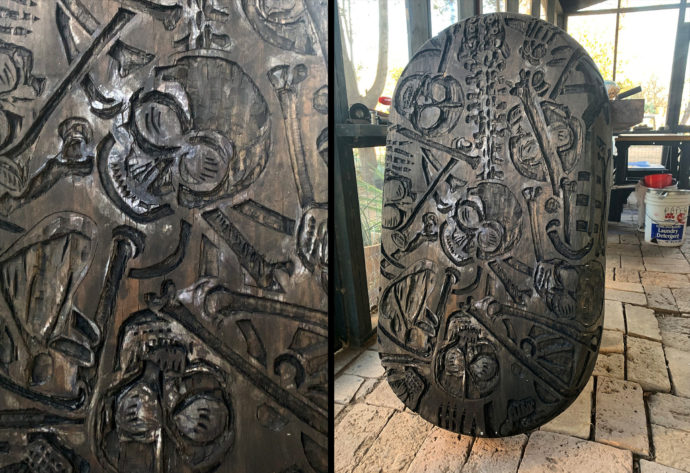
The matrix for Eric Avery’s “COVID Bowl of Bones”
Introduction
At artist Eric Avery’s invitation, in March 2022 I traveled to his studio in the historic village of San Ygnacio, TX, situated on a rise above the Rio Grande about 30 miles downriver from Laredo. The intention was to make a copy of his dimensional woodcut COVID Bowl of Bones. The process would take three days: One day to prep the paper pulp, ink the block, lay on four layers of pulp onto the block and sponge as much water as possible from the laid-on pulp, then 36-48 hours to dry the pulp (so the layers of pulp become paper) and finally to oh-so-carefully free the paper from the block. The finished woodcut would be 44″ long, 24 ” wide and 6″ deep. This post presents the whole sequence.
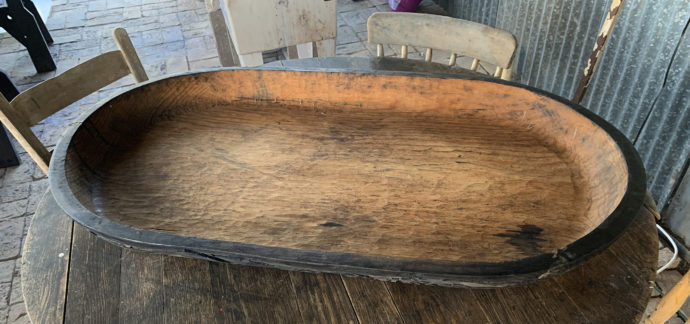
Avery’s COVID BOWL was made from this Mexican serving bowl.
Because I felt it was necessary to put Avery’s COVID Bowl into the context of his oeuvre, I interviewed Avery about how he came to make relief prints, specially woodcuts, from surfaces (matrices) that weren’t flat. It turned out his first efforts went back 40 years. This interview is available in Part 1 of “Making a COVID Bowl with Eric Avery.” (LINK) If you haven’t already, I do recommend that you read that post first. Avery’s website–docart.com–is a wonderful location to learn more about this inventive and dedicated artist.
All images of artwork by Eric Avery are used with the permission of the artist.
All photos are by Scott Ponemone, except where noted.
THE PRocess
Avery bought the hand-gouged Mexican wood serving bowl (above) some 40 years ago in Laredo Nuevo, Mexico, but not until 2021 did he carve the underside with a scattering of human bones (see the top of the post). It was his heartfelt response to the COVID pandemic. As a retired doctor and AIDS psychiatrist, he couldn’t react otherwise.
As you can image you can’t just take a prepared sheet of paper and expect it to curve around the convex side of that Mexican bowl. The process began when Avery showed me how to make the paper.
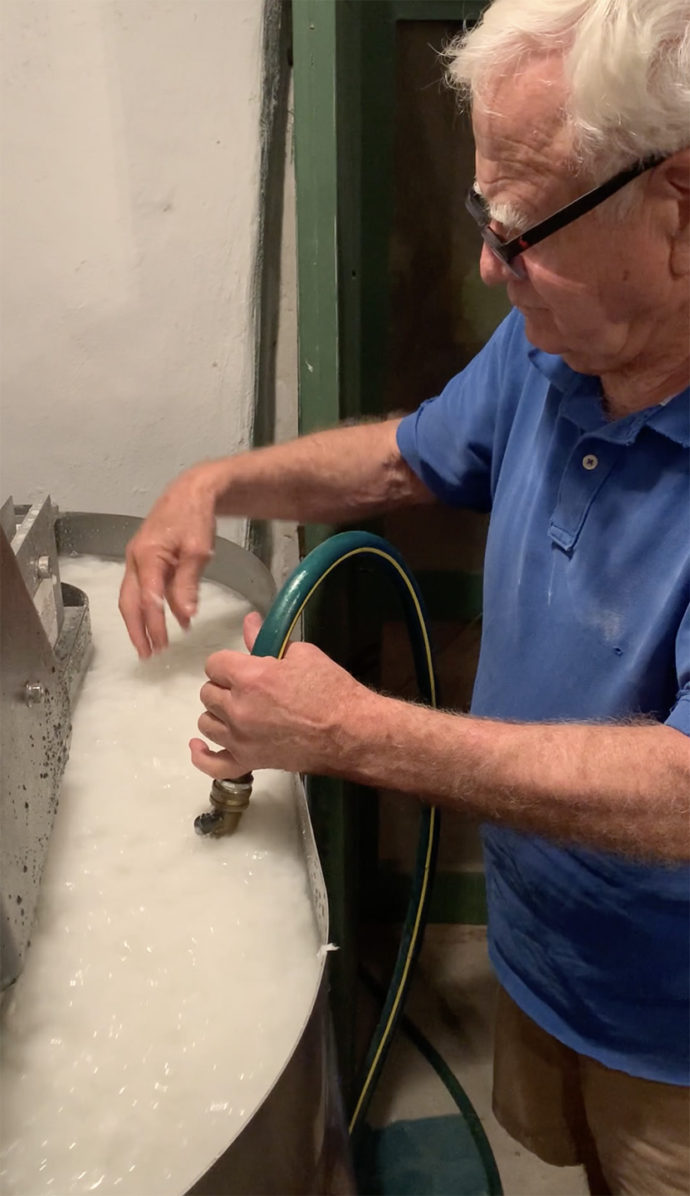
Avery at his Hollander Beater.
We started by soaking large sheets of two types of material: cotton linters with its short cellulose fibers and abaca, from Philippine banana plants, with longer, stronger fibers. After a hour or so, we entered Avery’s paper-making studio and prepped his Hollander Beater. We adjusted the position of the drum, added water to its racetrack-shaped tank, and started the drum. Then we first beat the cotton linters by tearing the soaked sheets into fist-size pieces and dropping them into the tank. The motion of the drum sent the pulp infused water on it’s clockwise course around the racetrack. We used our fingers (on the side far from the drum) to help keep the pulp in motion. After a while we lowered the drum to enhance the beating of the pulp. An hour later we drained the pulp into a five-gallon bucket. We repeated the process with the abaca.
To see Eric Avery helping the cotton linters along in his hollander beater, click on EA pulping video
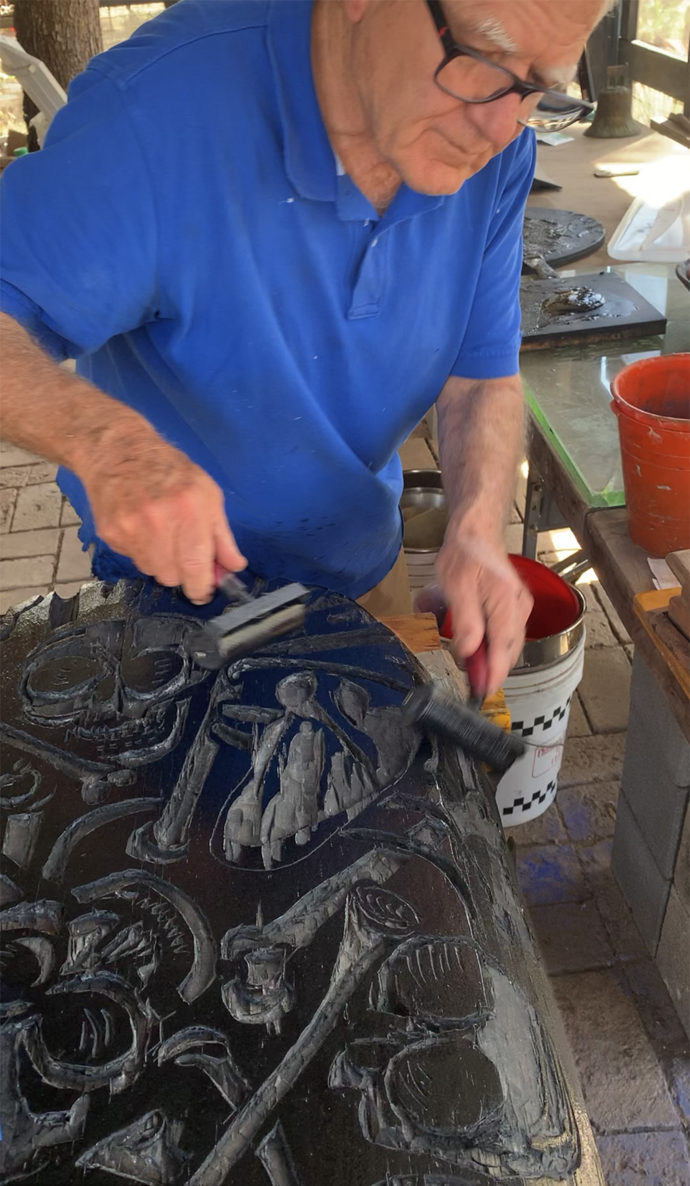
Avery used two brayers to ink the block.
I lugged a five-gallon bucket of beaten cotton linters and another of abaca from the two-room 19th-century stone building where the Hollander Beater operated (I slept in the other room) to the enclosed porch of Avery’s studio. Then I dumped the buckets into a sink on the porch.
Meanwhile Avery worked up a blob of black relief ink on a wood block on a nearby table. (See the ink in the right of the photo.) Between the sink and table where the ink was worked up was another table that was just the right size for the Mexican serving bowl to rest with the carved side face up.
Avery handed me a 4-inch brayer, while he sometimes used two brayers at once. While the surface of the carved bowl was broad, it was also curved. Ergo, small brayers are better for inking it up than wider ones.
Here’s a short video of Avery at work: EA Inking
(Because I also was taking photos, you don’t see me pitching in. But I assure you Avery wouldn’t allow me to be a spectator. Remember that his invitation was for me to make a copy of his COVID Bowl woodcut.)
While I have years’ experience making relief prints–namely small wood engravings–I’ve never worked on woodcuts or anything close to the scale of this Mexican bowl. So I relied on Avery to determine how much ink was enough. He showed me how to recognize the look of a well-inked section by holding my head at just the right angle.
When it came to moulding sheets of pulp over the inked Mexican bowl, there’s plenty of proof that I was put to work.
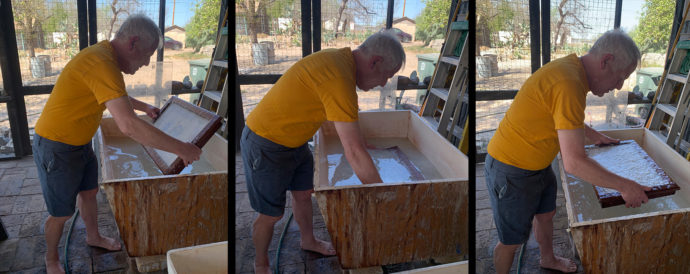
Avery photos
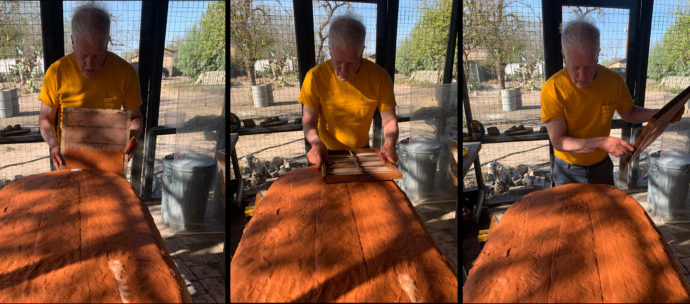
As a complete novice when it came to paper-making, I needed guidance from Step 1. Above are three photos that showed me (L to R) holding the mould above the pulp-filled sink at the right angle for dipping. Then I raised the mould parallel to the surface before I let some of the slurry drain off.
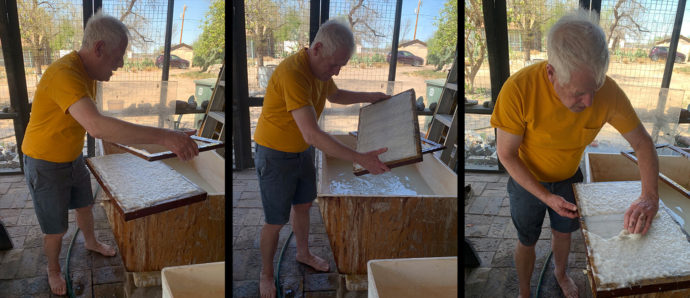
Avery photos
The next step (L to R) was to lift off the deckle (the wood frame) that made the irregular (deckle) edge to the rectangle of pulp, followed by more drainage of water. The third photo shows me removing some of the pulp because at the moment the area that needed to be covered was smaller than the mould.
Avery photos
By the time these photos were taken, all most all of the overturned Mexican bowl has been covered with one sequence of overlapping rectangles of pulp. Here (L to R) I positioned the mould over the end of the Mexican bowl that had yet to be covered. Then I gently rolled the mould over the end, pressing down somewhat before I lifted off the mould, now pulp free.
At Avery’s instruction we covered the bowl with the pulp three times. He even had his assistant Samuel Herrera try his hand at dunking the mould into the pulp and placing a few rectangles of pulp over the bowl. These three sequences of pulp formed the white layer.
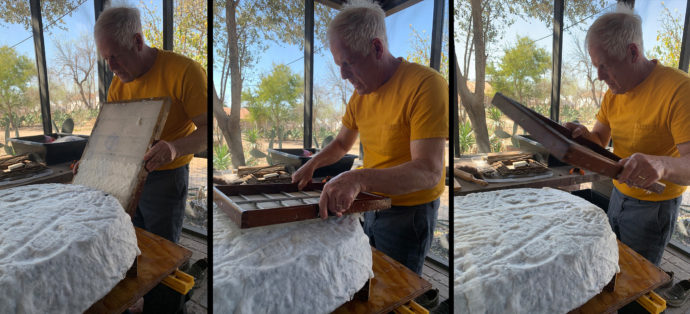
Then for the second layer of pulp, Avery added red iron oxide pigment to the pulp. He wanted the underside of his COVID Bowl woodcut to have a sense of the earth as if the bones of the woodcut were uncovered in a grave. I only made sequence of dyed pulp rectangles over the white layer. (Before we began paper making Avery feared he didn’t have enough red iron oxide, so he ordered more. Yet when UPS delivered it just in time, Avery was dissatisfied. He felt the new pigment was more umber in color. So we used the remainder of his red iron oxide and had just enough for the dyed layer.)
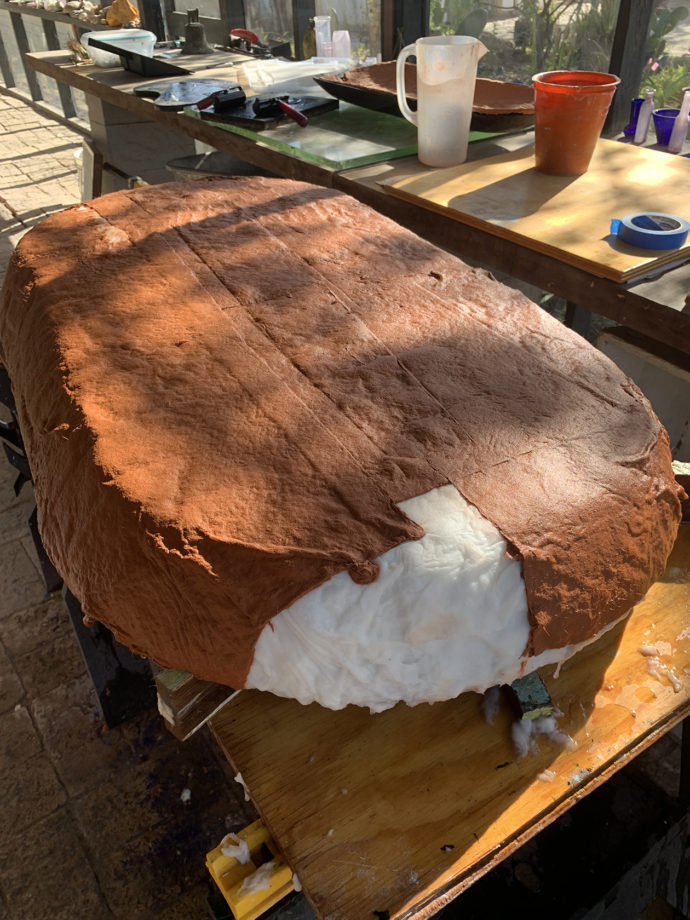
This close-up of the Mexican bowl shows an end where the dyed pulp had yet to be placed. The overlap of rectangles of dyed pulp are clearly visible.
Avery photos
The large photo (above) shows the last large place needing a layer of dyed pulp. Then the three photos show me applying a partial sheet of pulp over that end of the upturned bowl.
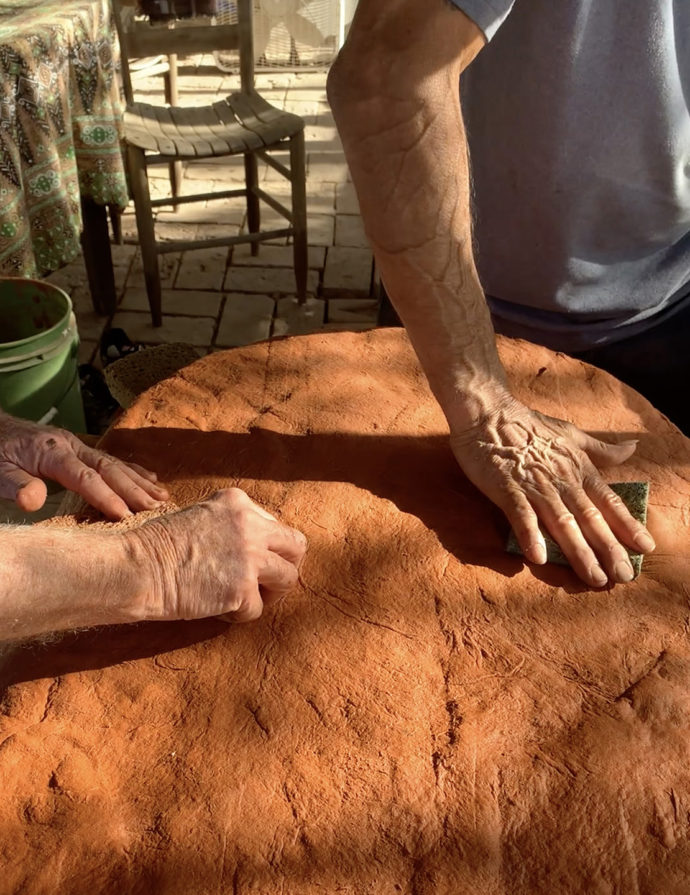
Herrera (right) and I begin sponging water from the four layers of pulp.
Imagine how much water there was in four layers of paper pulp. So the next task was to sponge off as much water of pulp as possible before fans were set up to complete the drying.
The secondary but very important reason for sponging was so that the pressure of the process would help push the white pulp into the gouged out areas of the wood bowl. Avery and I were careful not to ink these recesses because the recesses would become the bones and need to be kept white, the color of the first three layers of pulp.
Here’s a short video of our sponging: EA sponging video

Here Herrera is checking out the air flow from the pair of fans placed above the sponged bowl.
All the above work was done on a Wednesday. By Friday Avery determined that the pulp had dried into paper. The most delicate part of the operation was to begin.
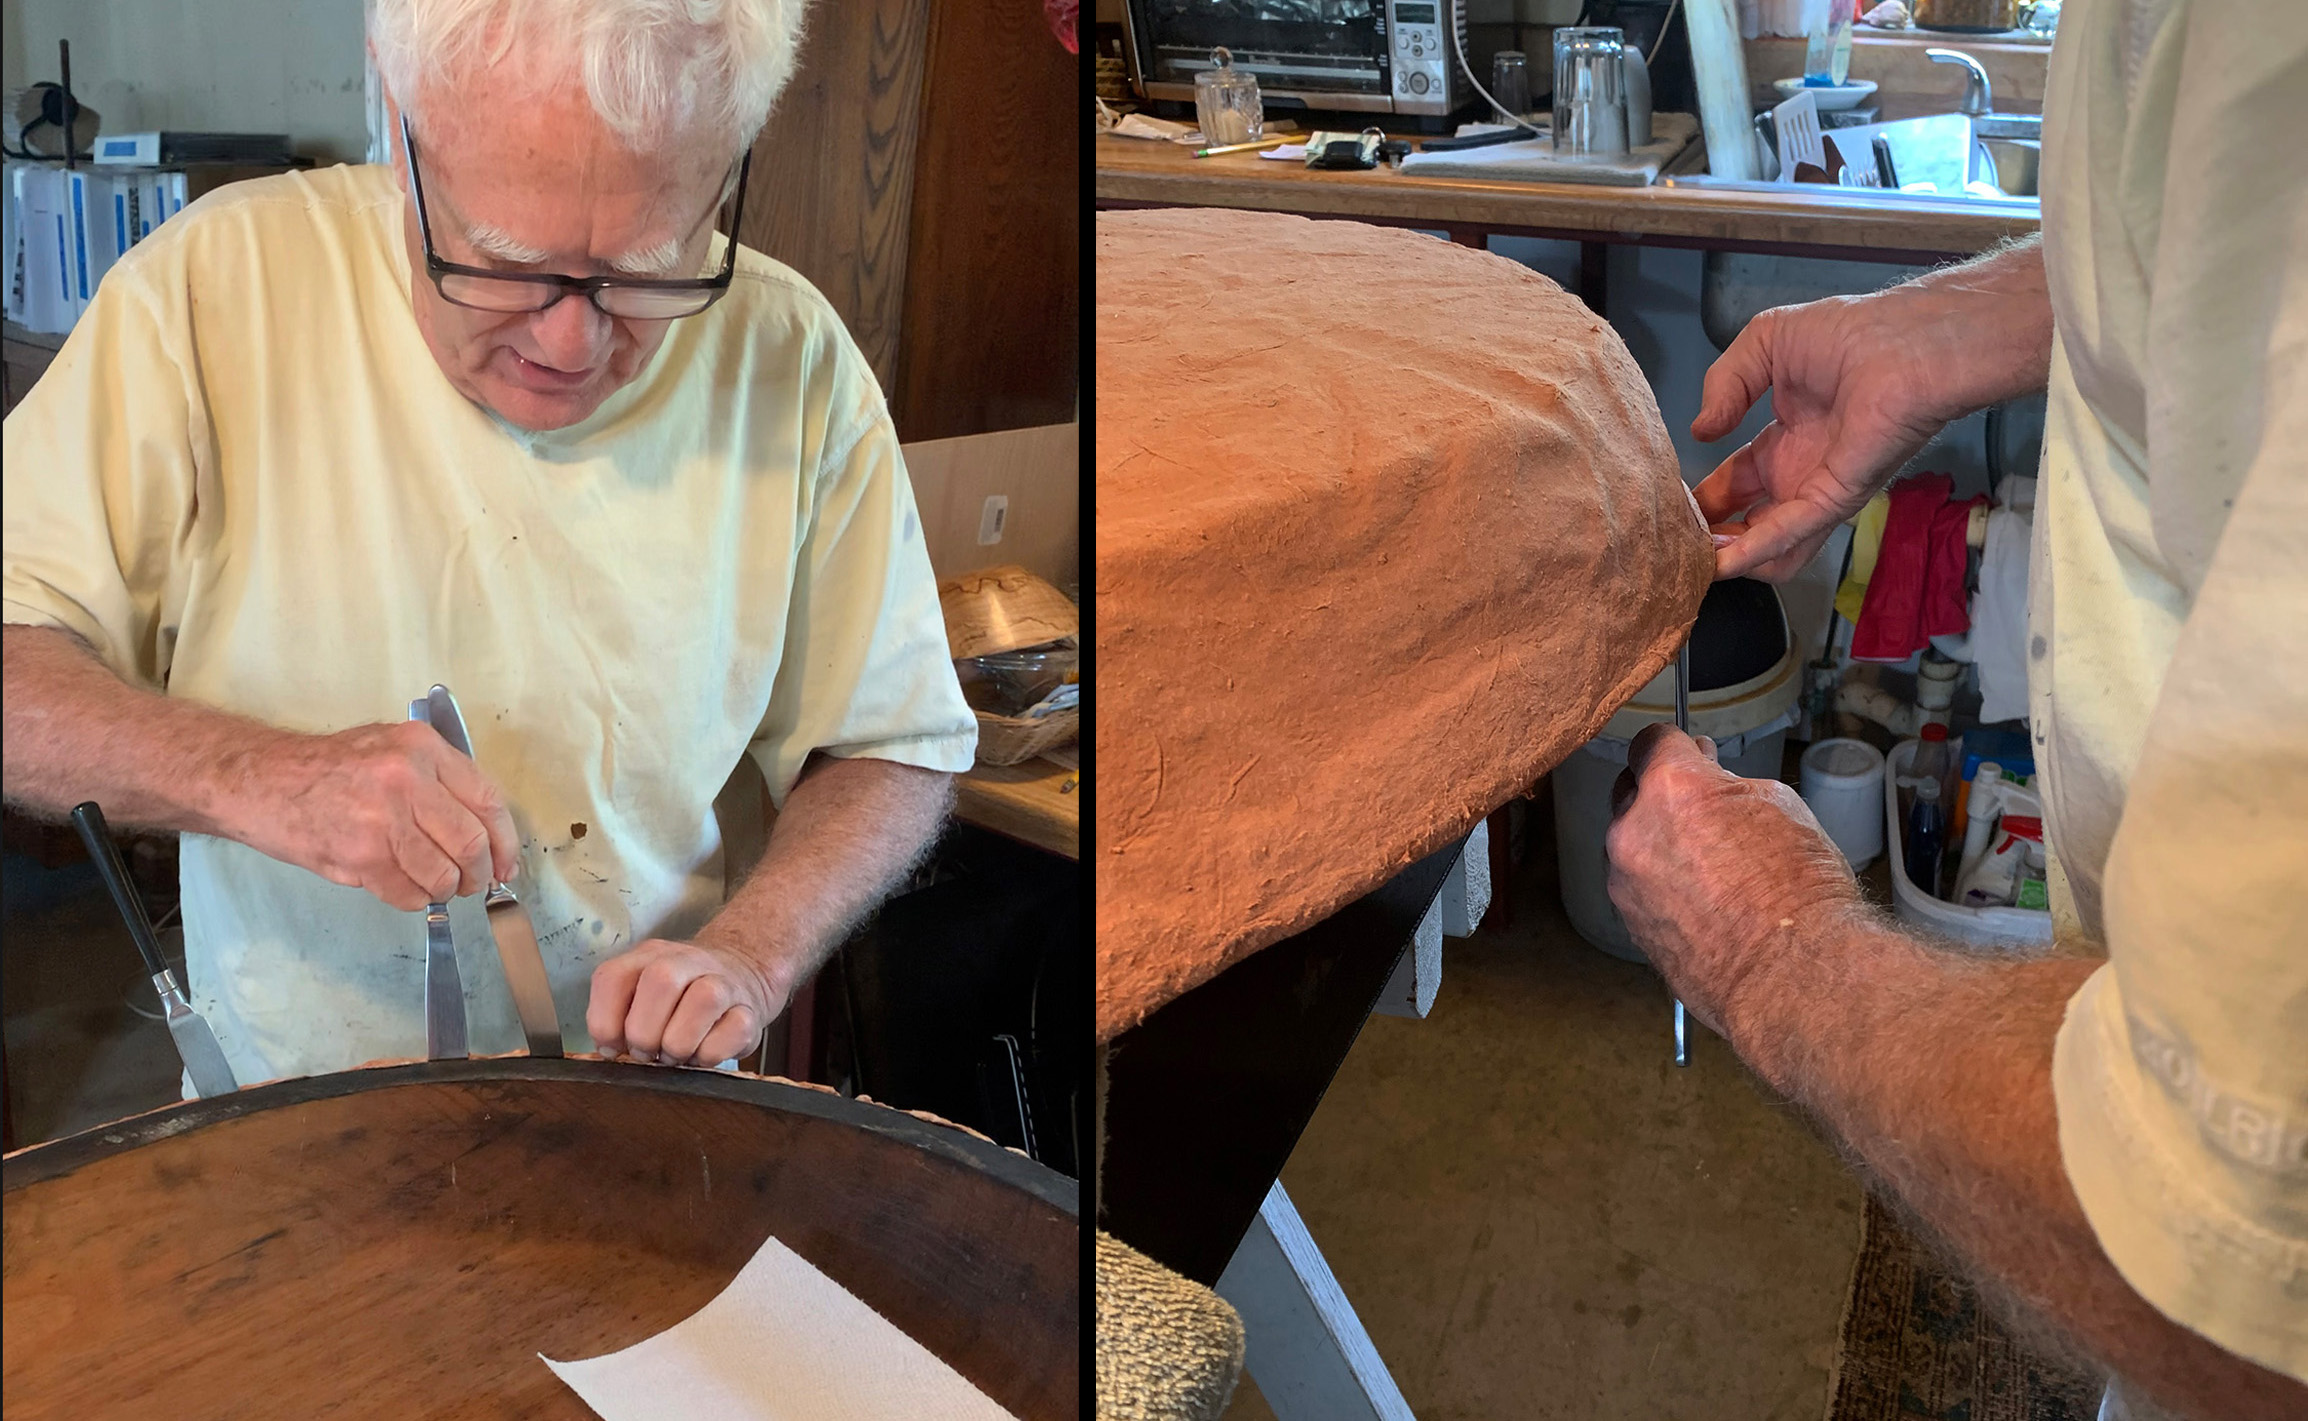
With a squadron of butter knives we set to work. The long sides pried off relatively easily. As Avery noted you could hear the ink releasing its grip on the wood with a very soft hiss. The ends were much more stubborn. I was so afraid of tearing the paper that I let Avery take the lead on the ends. At times he was pessimistic that the wood bowl would ever release the print (i.e. the paper). But then our slow, careful efforts paid off. Suddenly the paper was free.

Avery photo
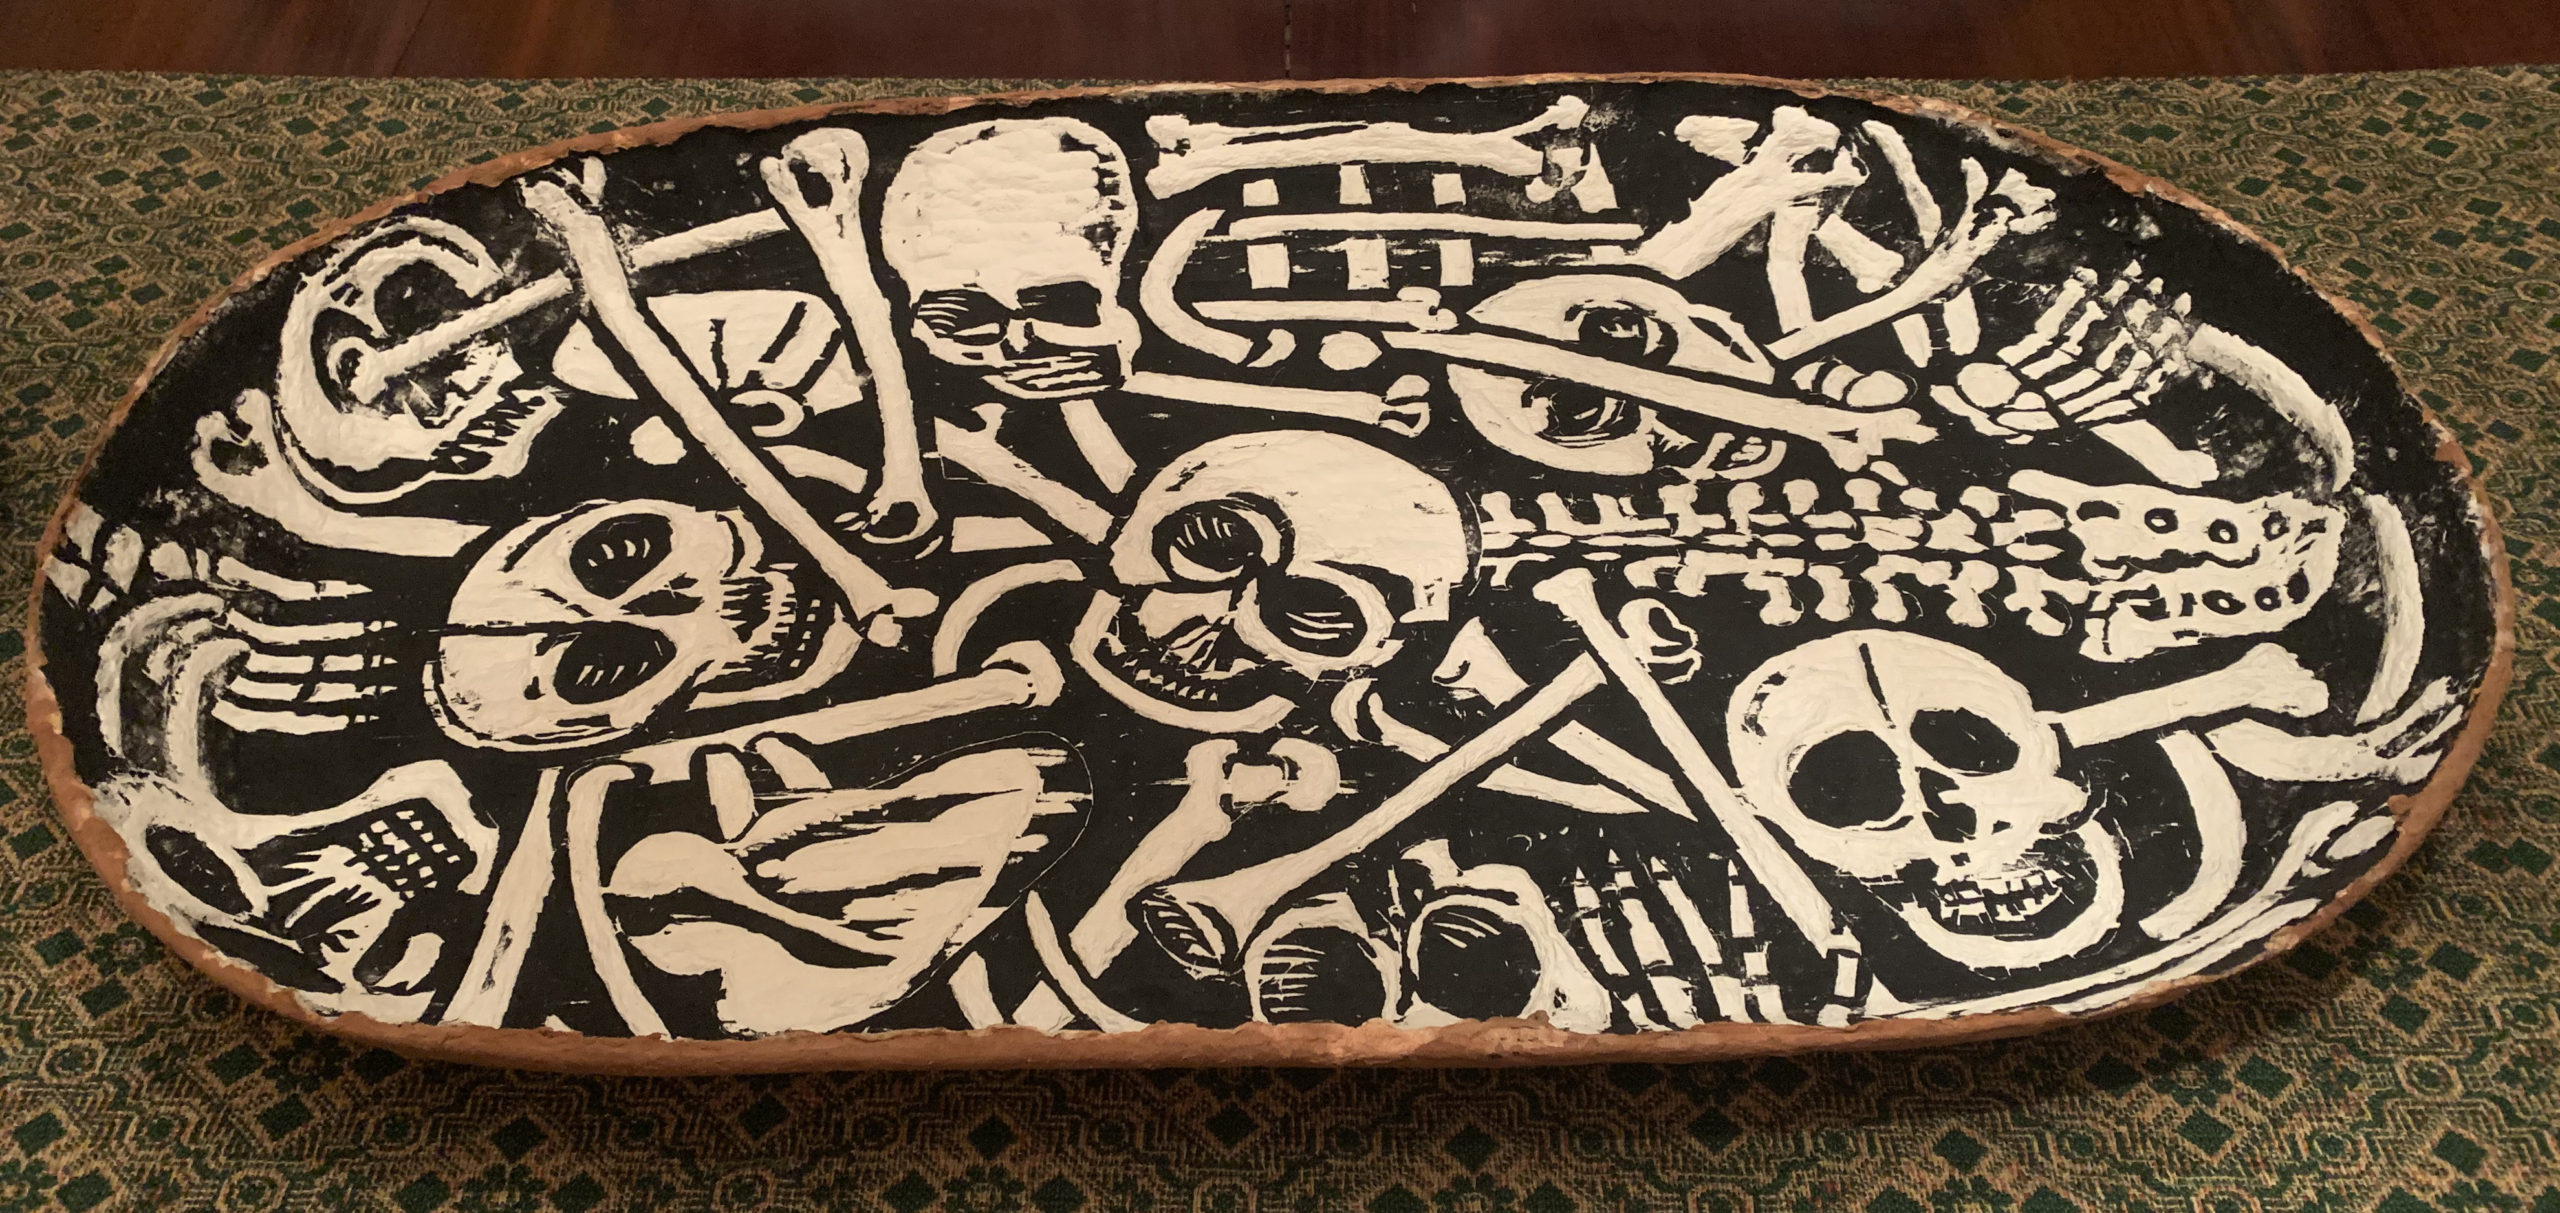
I had my copy of Eric Avery’s COVID Bowl of Bones. He would later sign it on the underside as No. 4 of an edition of 10. (But that was a projected edition of 10. Probably any of the last 6 would only be made on demand.) Several days later he applied a polymer seal over the print front and back.
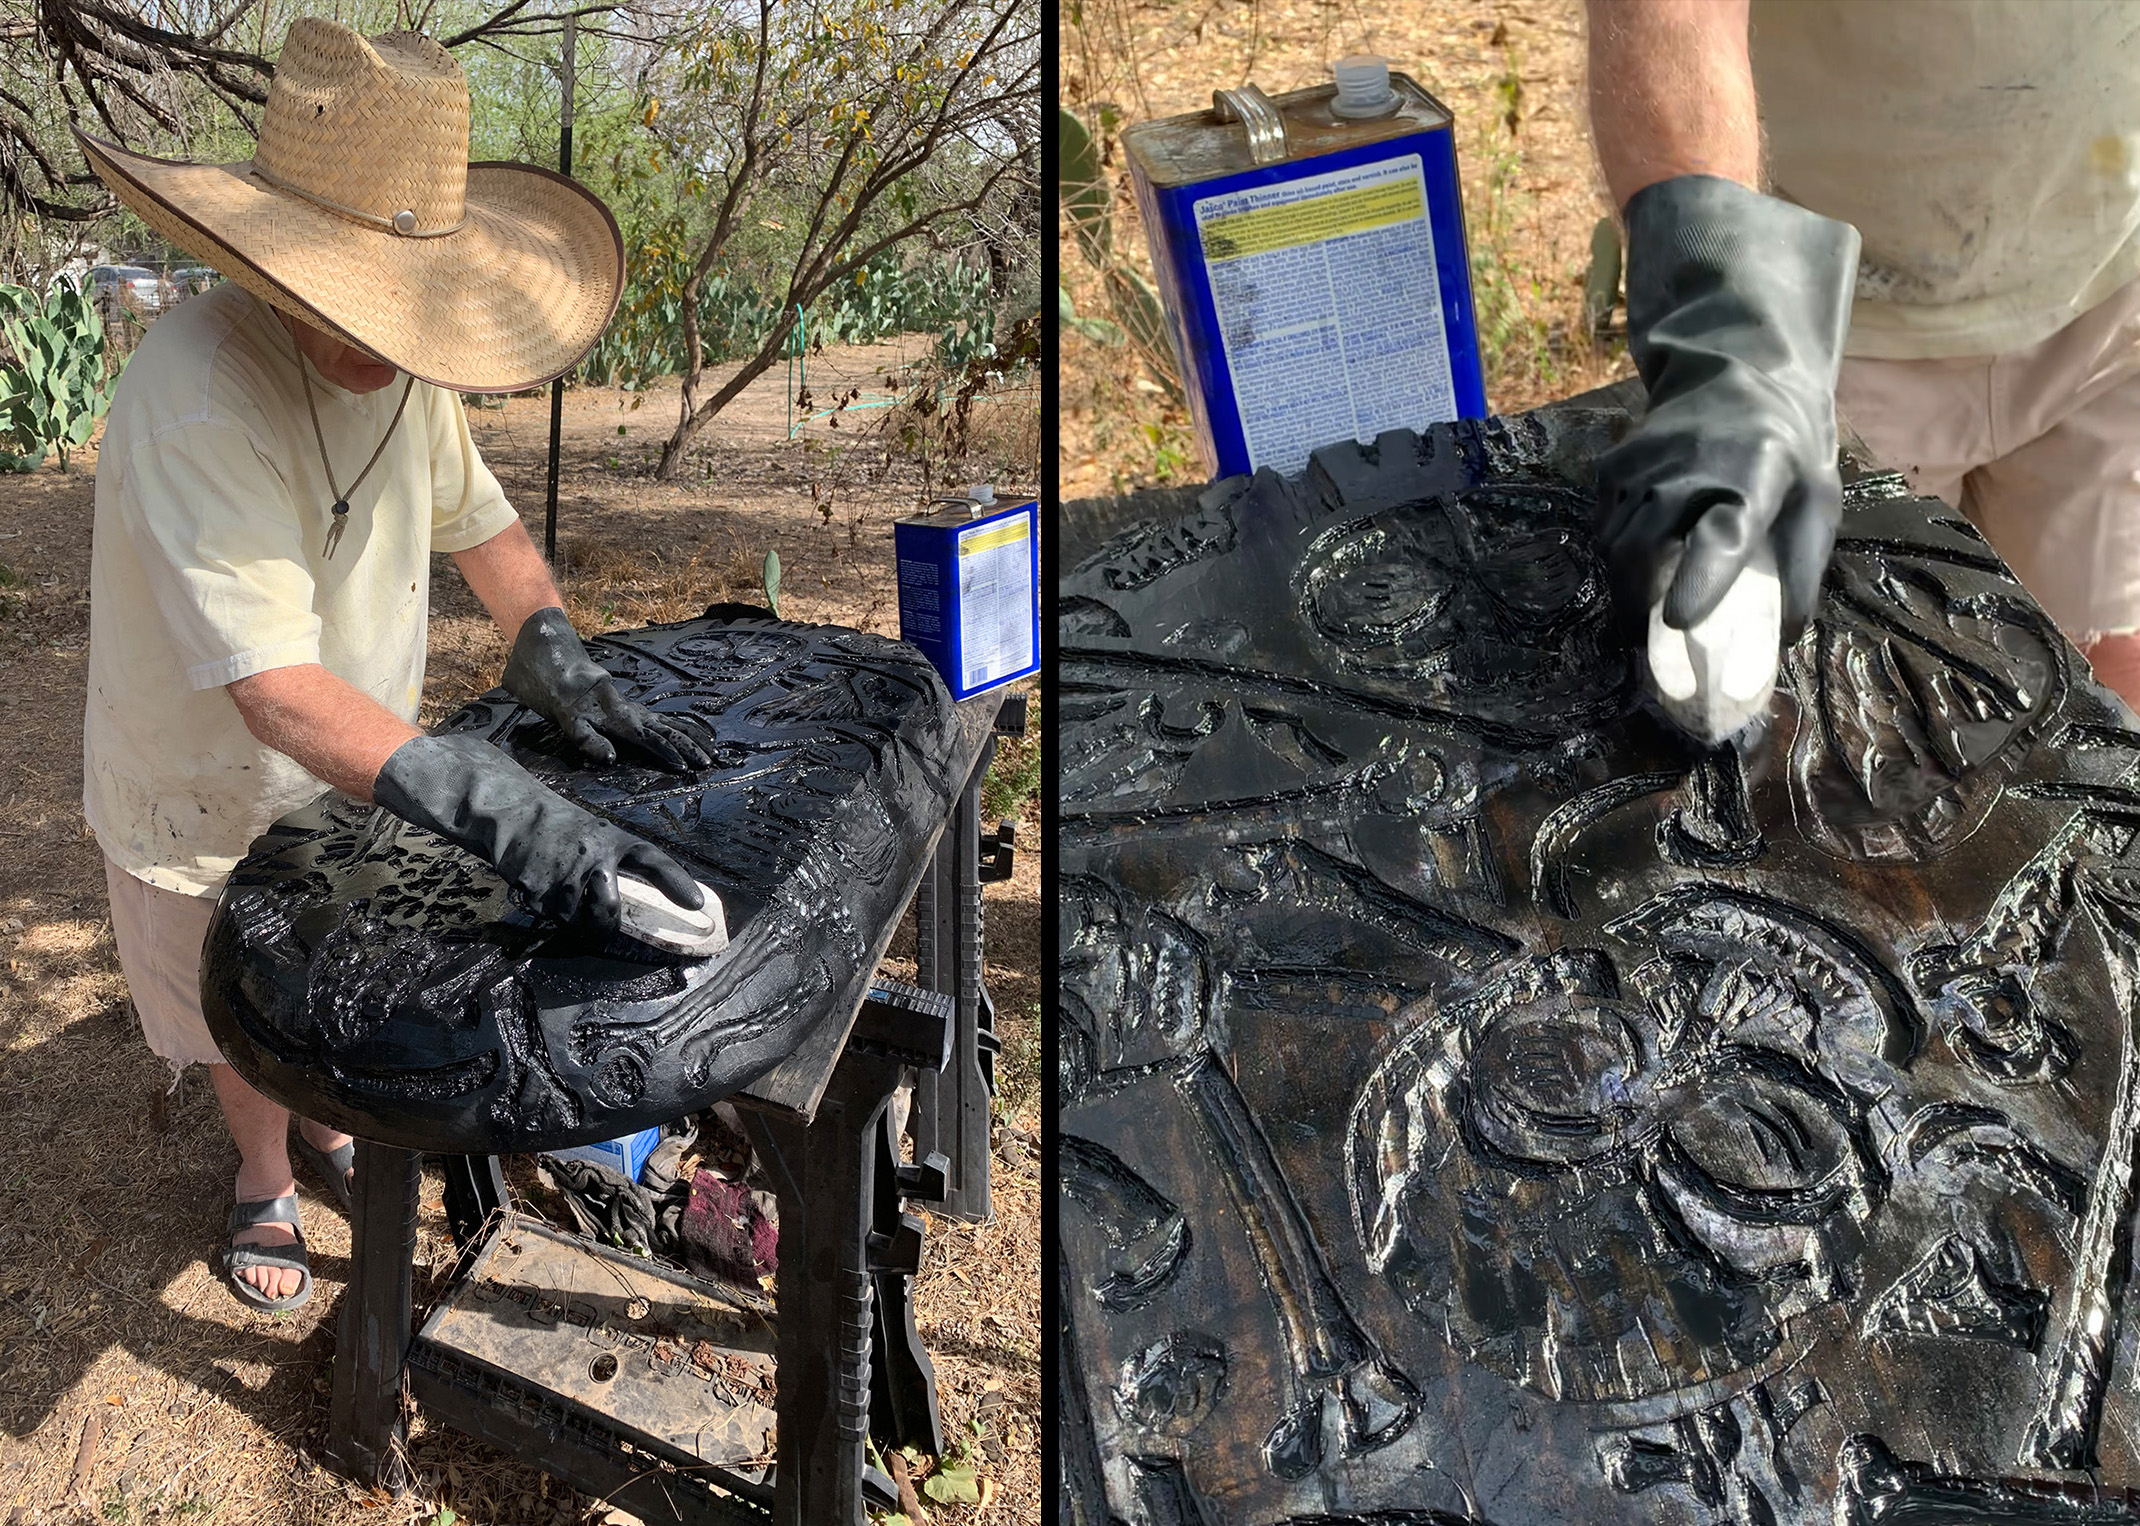
While my work was done, Avery needed to protect the block, first by using mineral spirits to scrub off as much ink as possible and then to fan it dry. There was always the danger of splits developing in the bowl from soaking it with paper pulp. The Mexican bowl already had been sutured with staples along a split before we began. Fortunately the Mexican bowl survived the making of my copy of COVID Bowl without further damage.
I left without my woodcut on Saturday to spend a few days with cousins in San Antonio. The agreement was that I would pay for the boxing and shipping, but Avery would have to arrange for both. So a week after I left for Baltimore, Avery drove to San Antonio. There his art handler determined that a wooden box was needed and that he had to drop everything to do so. So he charged for the box and for expedited service. Then Avery decided to go to Loredo (near his home in San Ygnacio) to use Fed Ex there. In a text message, he said: “It will have been driven 350 miles before it gets to Fed Ex. Definitely a process to bring this piece into existence.” The box arrived in Baltimore on April 3.
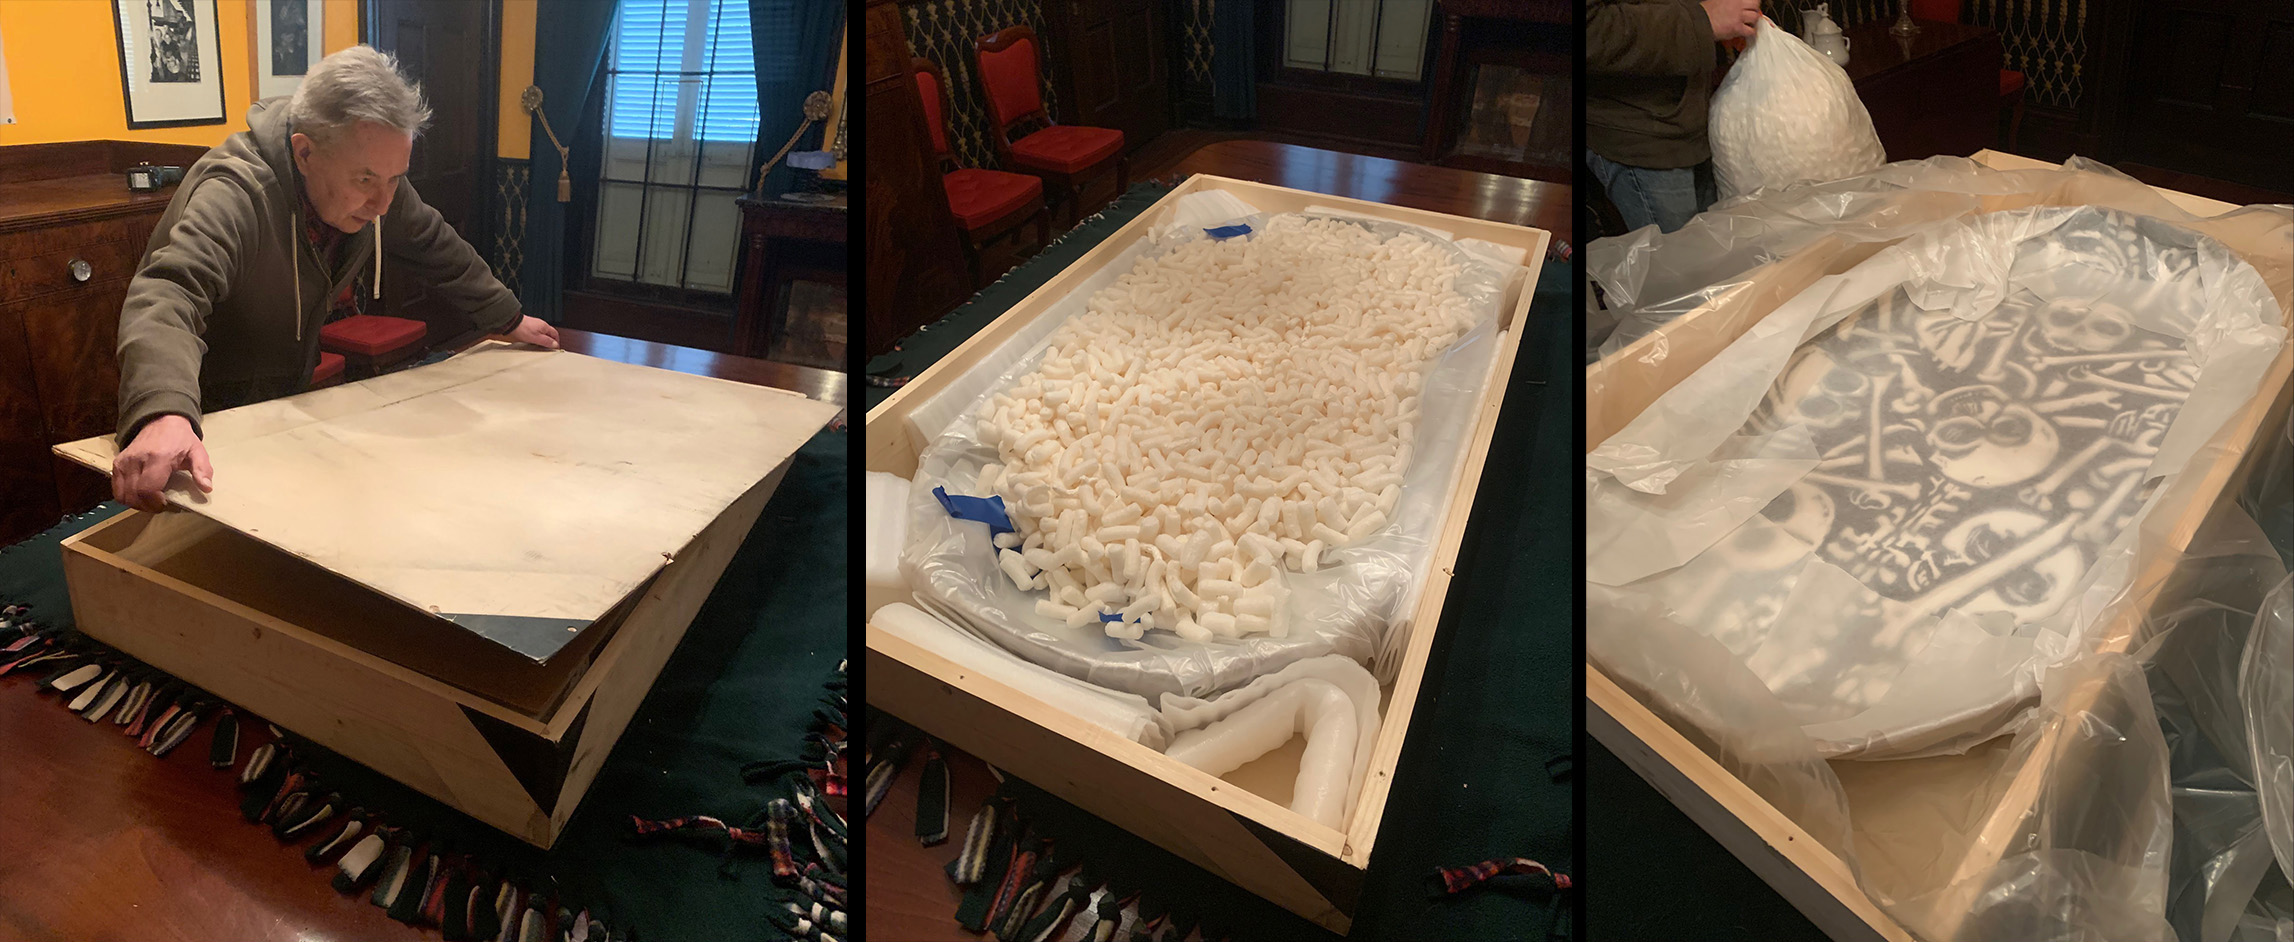
My husband Michel Frommeyer helped unbox it.
No. 4/10 of COVID Bowl of Bones is on display in my dining room.

A close-up illustrates how pressing the pulp into the gouges of the Mexican bowl created dramatic relief to the bones.
ENDNOTE
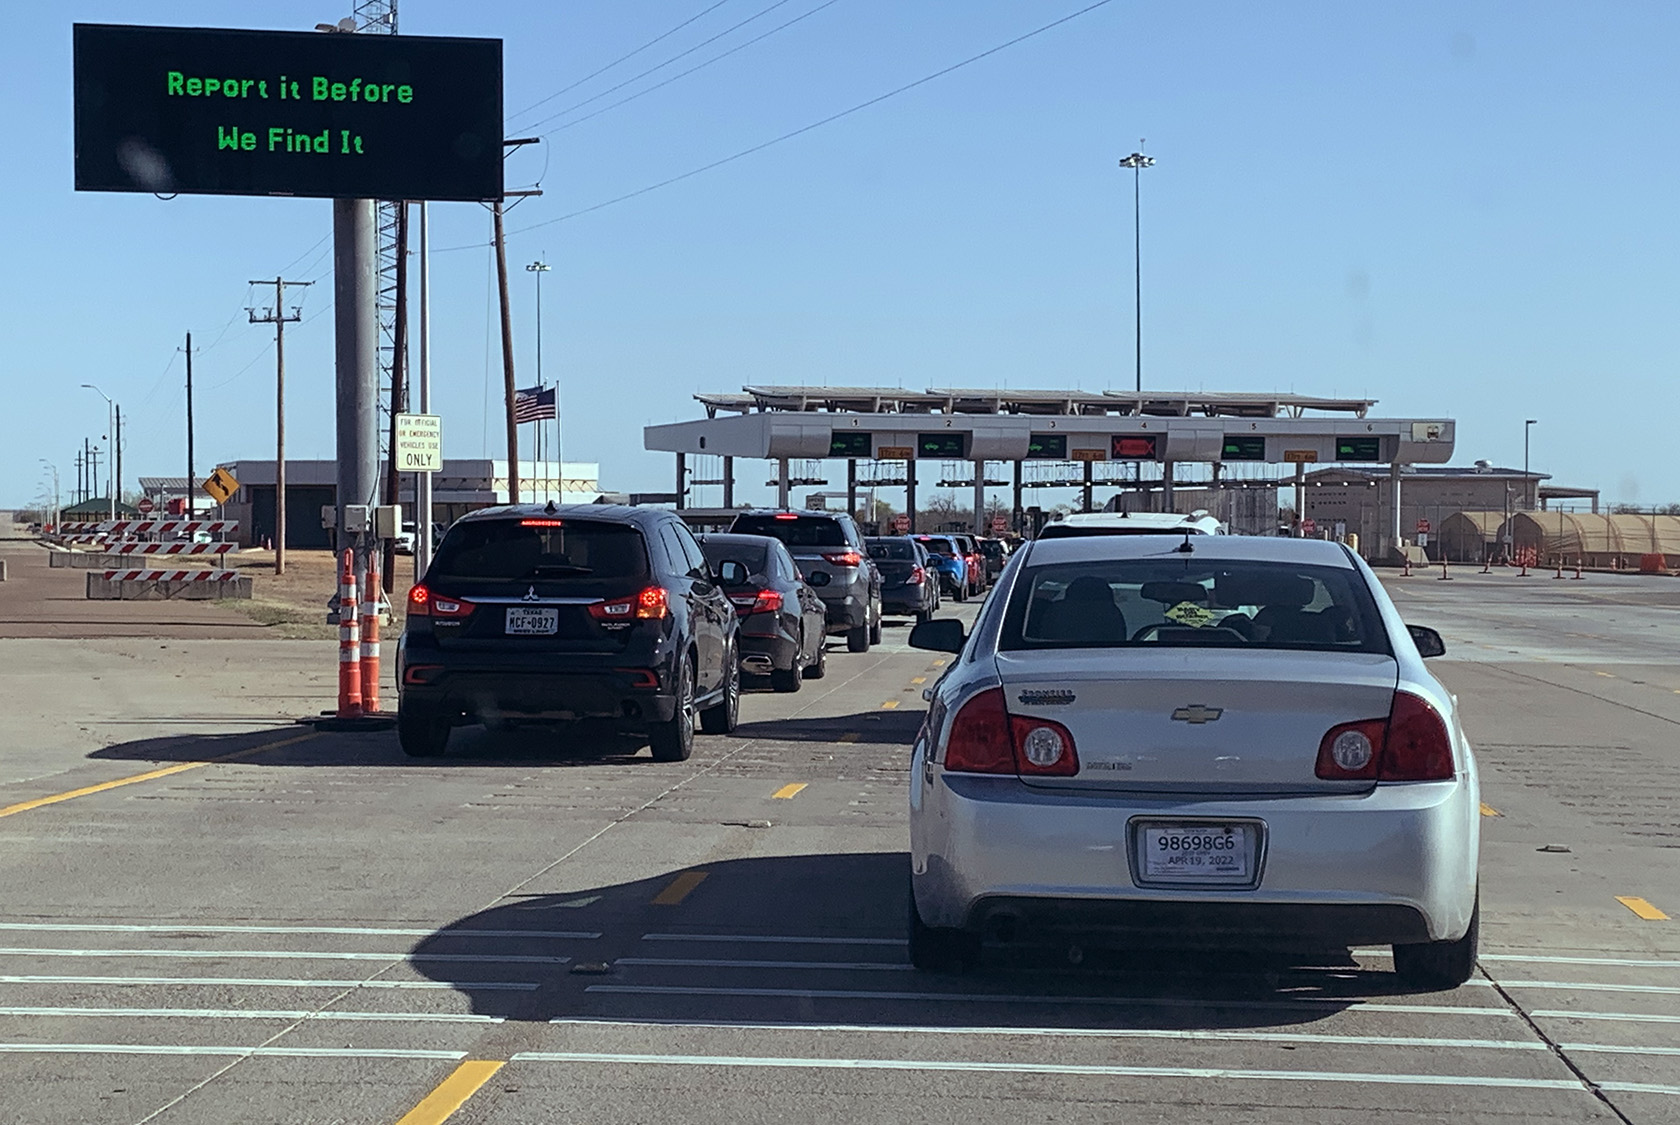
One clue that you’re driving north from the U.S.-Mexican border is this checkpoint. The drug sniffer dog checked out my rental car, and I was only asked: “Are you American?” before I was waived on.
* * * * *
Trackback URL: https://www.scottponemone.com/making-a-covid-bowl-with-eric-avery-part-2/trackback/
Leave a Reply
-
Accessions: Short Stories Dec 21, 2025

-
The Mike and Scott Show: No Reruns Nov 25, 2025

-
Griffin Chairs: Both naive and refined Oct 04, 2025

-
Circularity: The Pairing of Two Talents Jul 12, 2025

-
Frans Masereel: Workers’ Paradise in 1939 Europe Apr 11, 2025

-
Erich Glas: Through the Night vs. Leilot/Nights Jan 15, 2025

-
Gustav Wolf: His Monster Menagerie Dec 23, 2024

-
Linos: #5 through 15 Nov 01, 2024

-
Gustav Wolf: Confessio Aug 02, 2024

-
Justin Remo’s Big Finale May 21, 2024

-
Accessions: Short Stories Dec 21, 2025
-
The Mike and Scott Show: No Reruns Nov 25, 2025
-
Griffin Chairs: Both naive and refined Oct 04, 2025
-
Circularity: The Pairing of Two Talents Jul 12, 2025
-
Frans Masereel: Workers’ Paradise in 1939 Europe Apr 11, 2025
-
Erich Glas: Through the Night vs. Leilot/Nights Jan 15, 2025
-
Gustav Wolf: His Monster Menagerie Dec 23, 2024
-
Linos: #5 through 15 Nov 01, 2024
-
Gustav Wolf: Confessio Aug 02, 2024
-
Justin Remo’s Big Finale May 21, 2024